Chi-Chi’s Fried Ice Cream
Feeling nostalgic for Chi-Chi’s fried ice cream? Look no further, now you can make it at home and bring all your 90’s memories back! Matthew kept hinting to me that we should make this, so one year for his birthday I whipped it up and now it’s become an annual tradition. Below is a thorough walkthrough with step-by-step photos of the entire process, including the baked tortilla shells, to dropping the ice cream balls (carefully) in oil to fry. I hope this helps you, and you like the Fried Ice Cream!
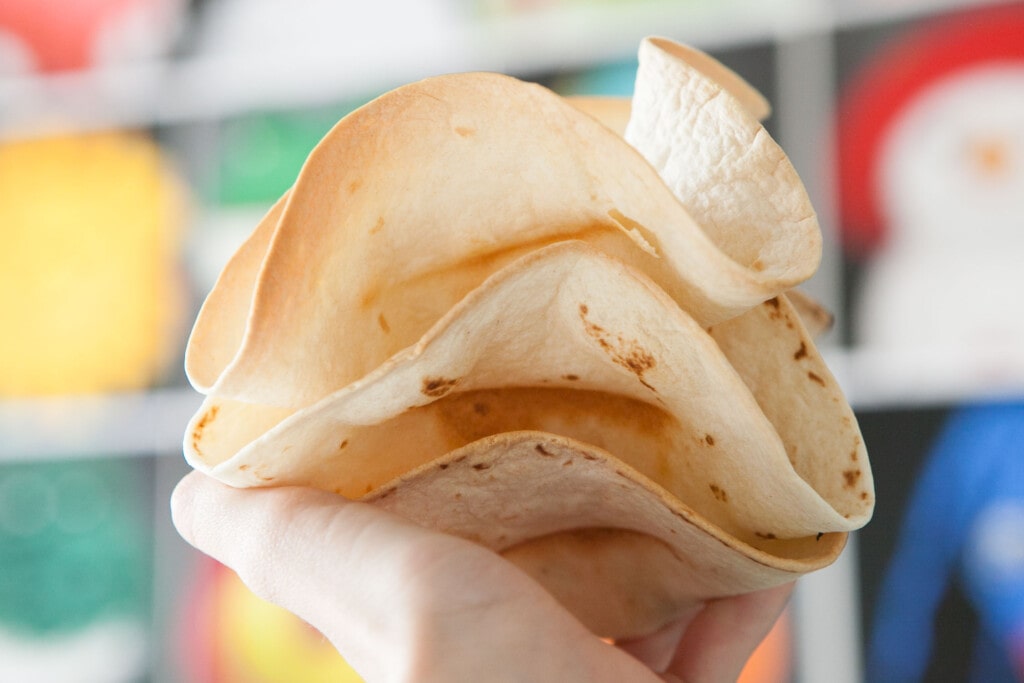
How to Make Tortilla Shell Bowls
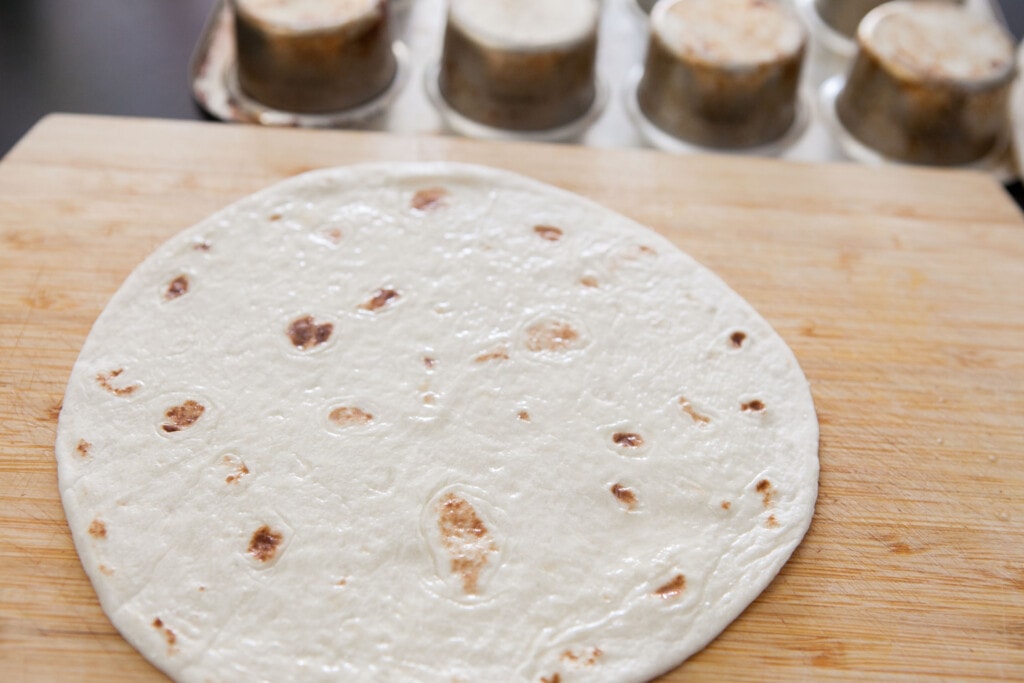
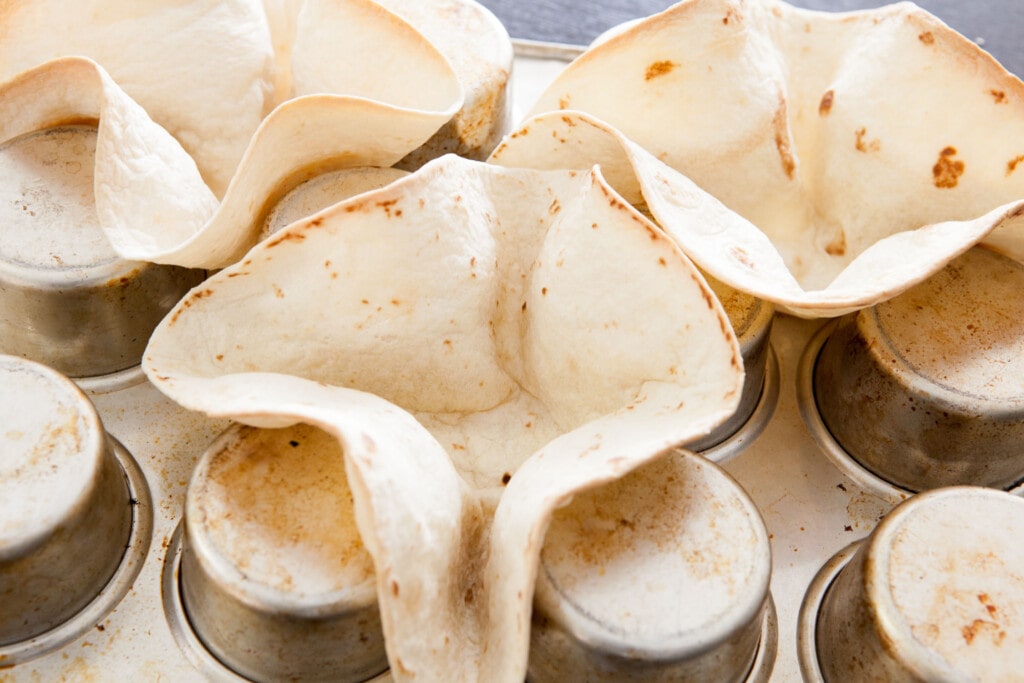
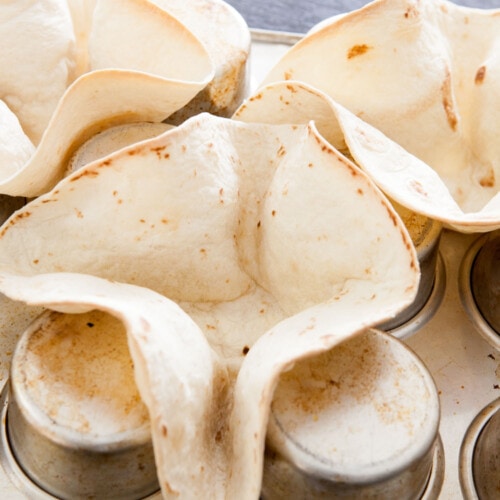
I wanted to include the entire recipe we make, including the baked tortilla shells bowl. If you’re just serving the ice cream in bowls, you can skip this step, but I do recommend you try the tortilla shell bowls at least once – they’re so crunchy and good! Microwave the tortilla shells so they are flexible and easy to bend. Spray each side with cooking spray, so they don’t stick. Grab a cupcake pan and turn it upside down. Alternatively, you could put them in a small oven pot or bowl if you have it. Push the tortillas into the upside down cupcake pan so it touches 4 of the cupcake holders. Press it down – this is what shape your tortilla bowl will become. Put it into the oven and bake. You want to keep a eye on these, generally mine usually take 12 minutes. Once they have a slightly brown edge, they’re done. When they come out of the oven, you’ll see how they have hardened. Let them cool and move on to making the ice cream!
How to Make Chi Chi’s Fried Ice Cream
Prepare a baking sheet with wax paper. This will help in preventing the ice cream from sticking.
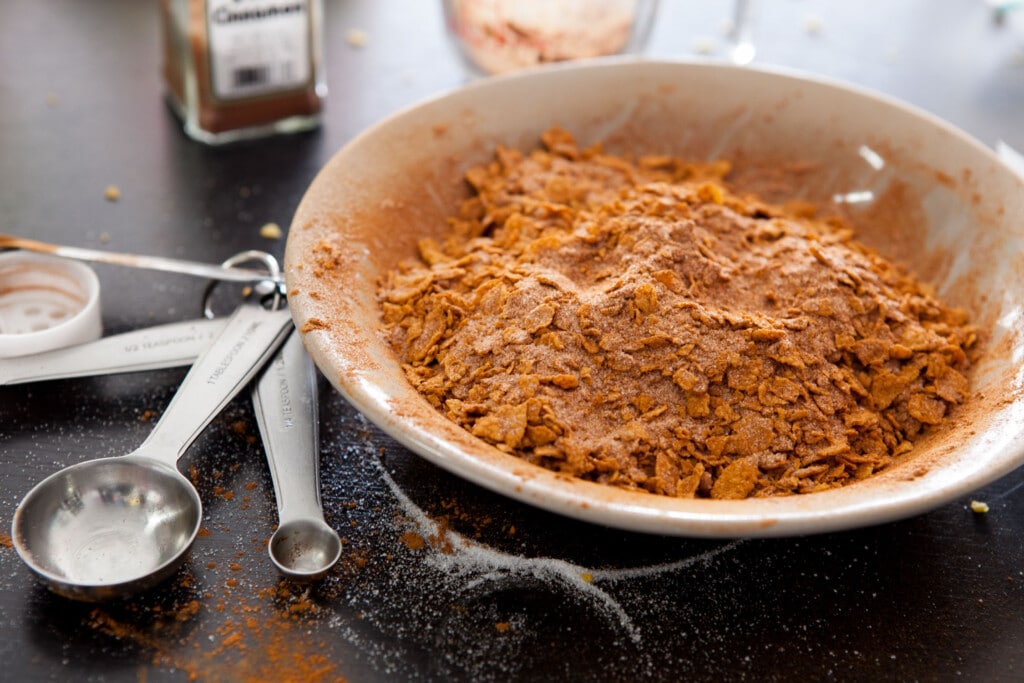
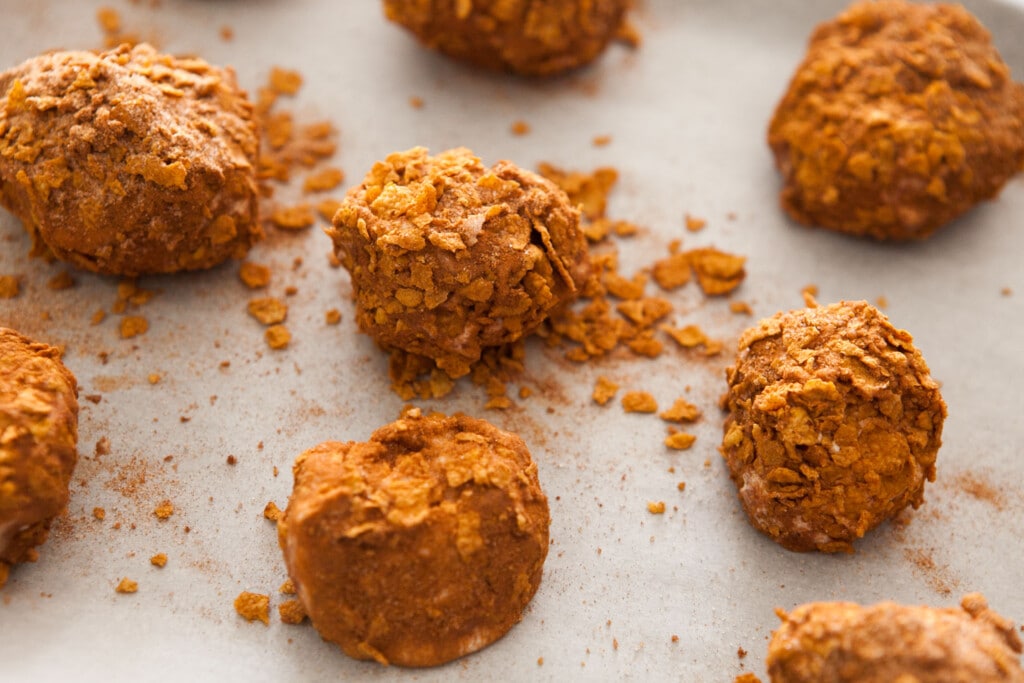
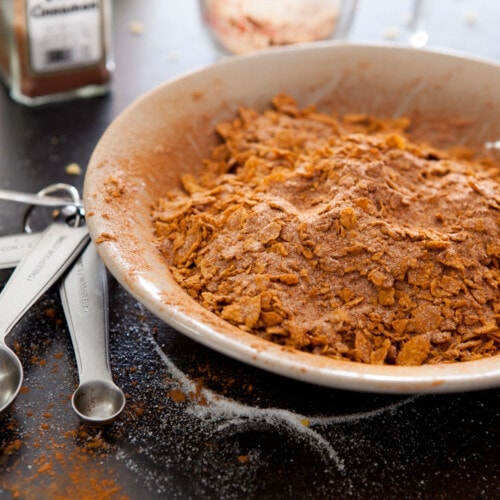
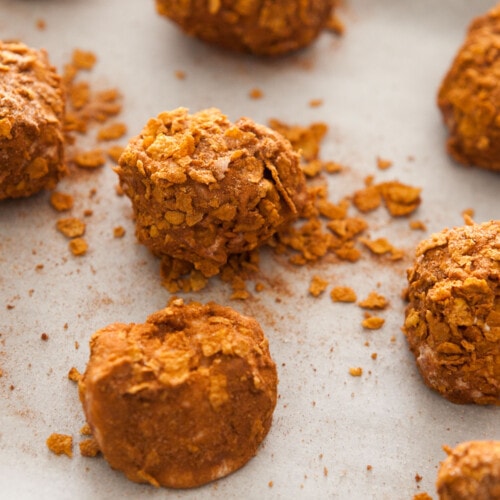
Crush up corn flakes.
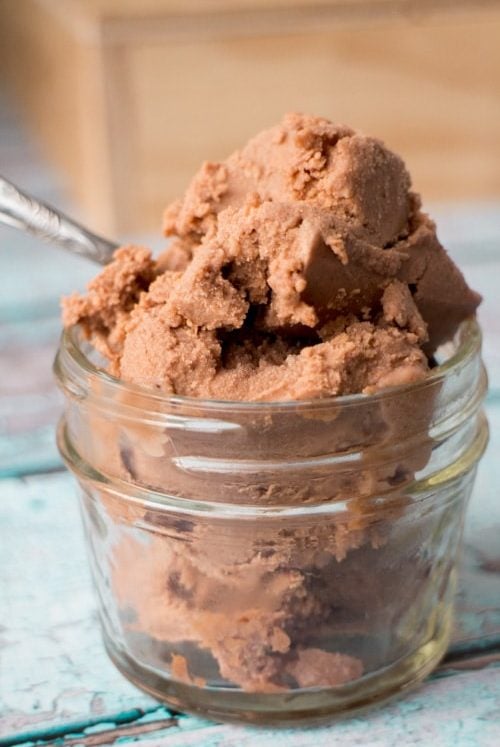
Prepare the sugar, corn flakes and cinnamon mixture. I totally made a mess.
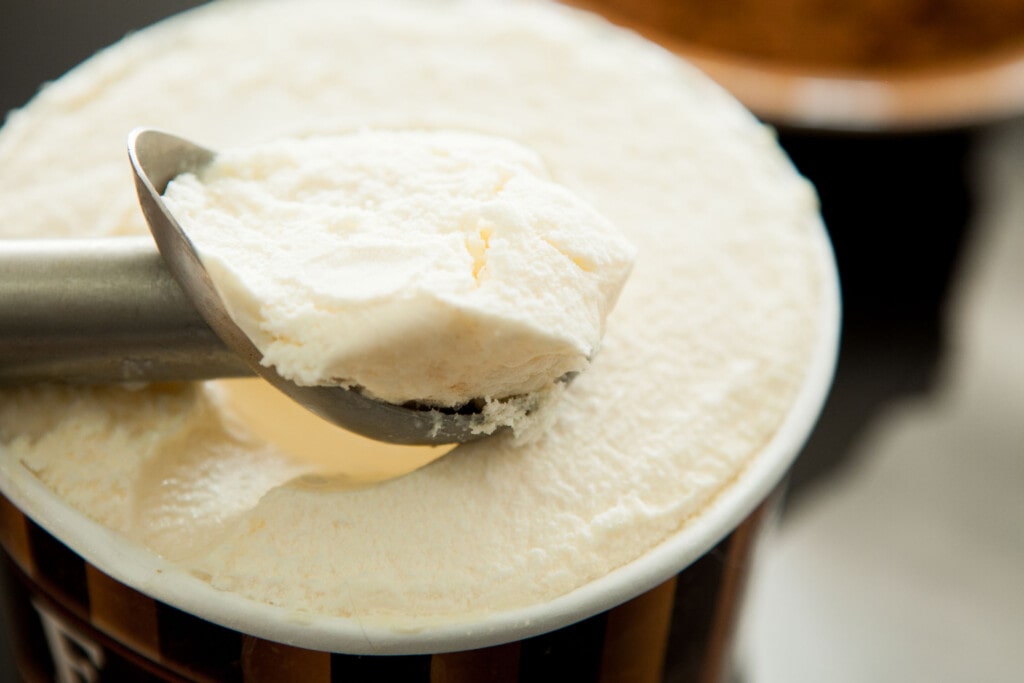
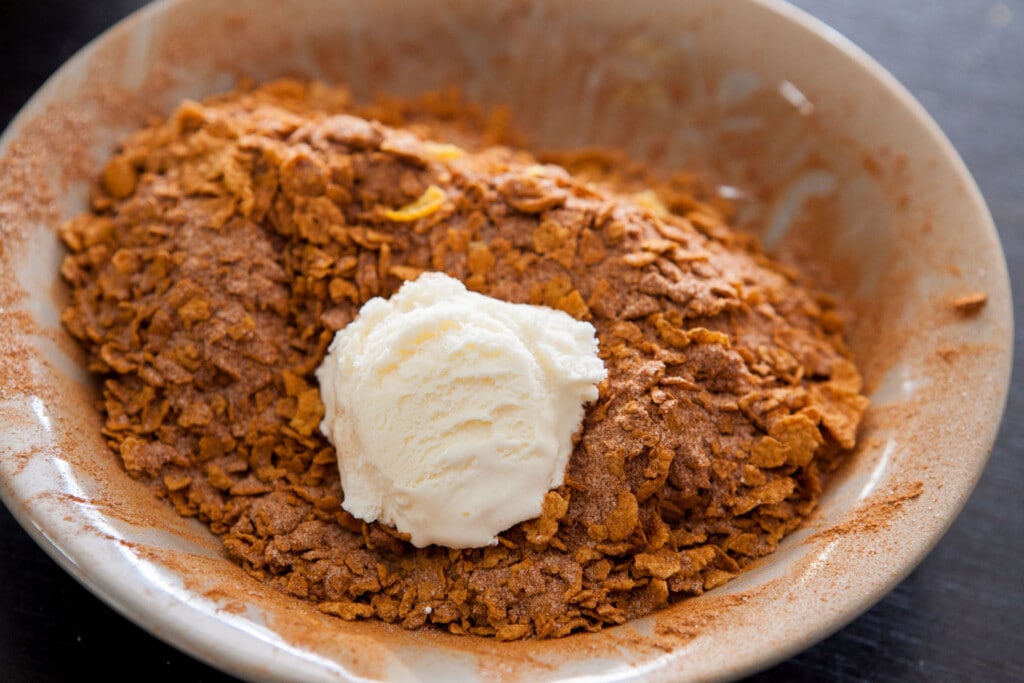
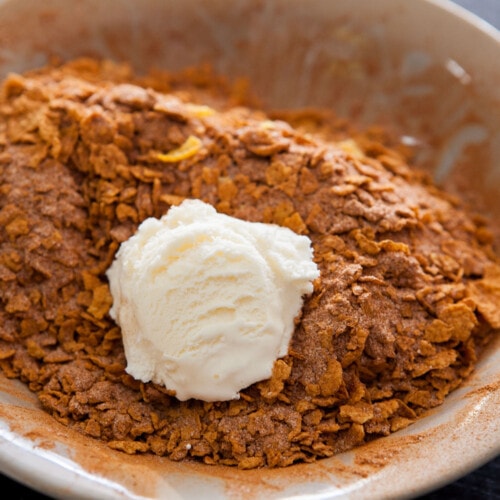
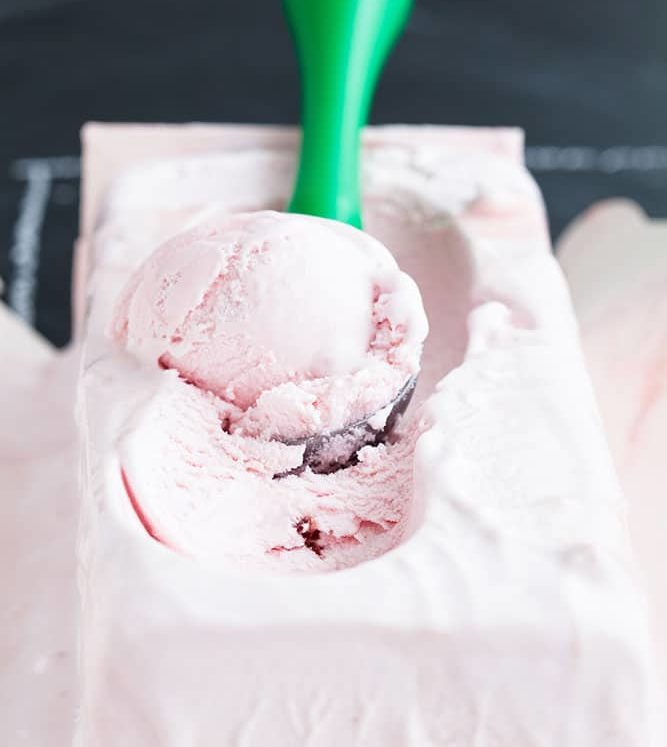
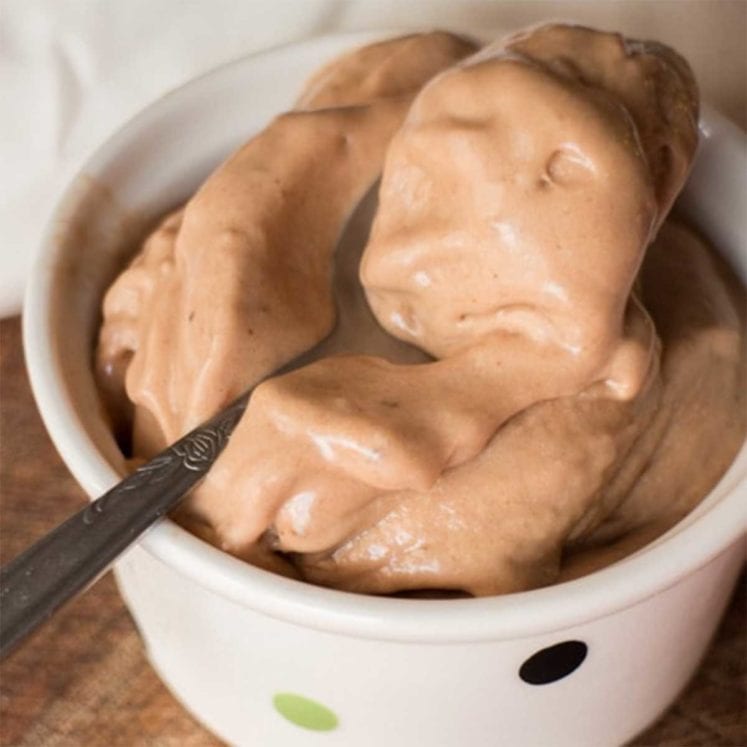
Grab your vanilla ice cream – use your favorite brand. Keep it in the freezer until you’re ready to begin. Scoop 1 to 2 inch balls of ice cream.
Drop into corn flake mixture and roll around. I like to pat them with my hands to roll into a more “perfect” ball shape.
Throw the ice cream balls onto the wax paper baking sheet. Now you have to work quickly as the ice cream will melt (especially if it’s during the Summer).
Put the ice cream balls into the freezer, for at least 1 hour.
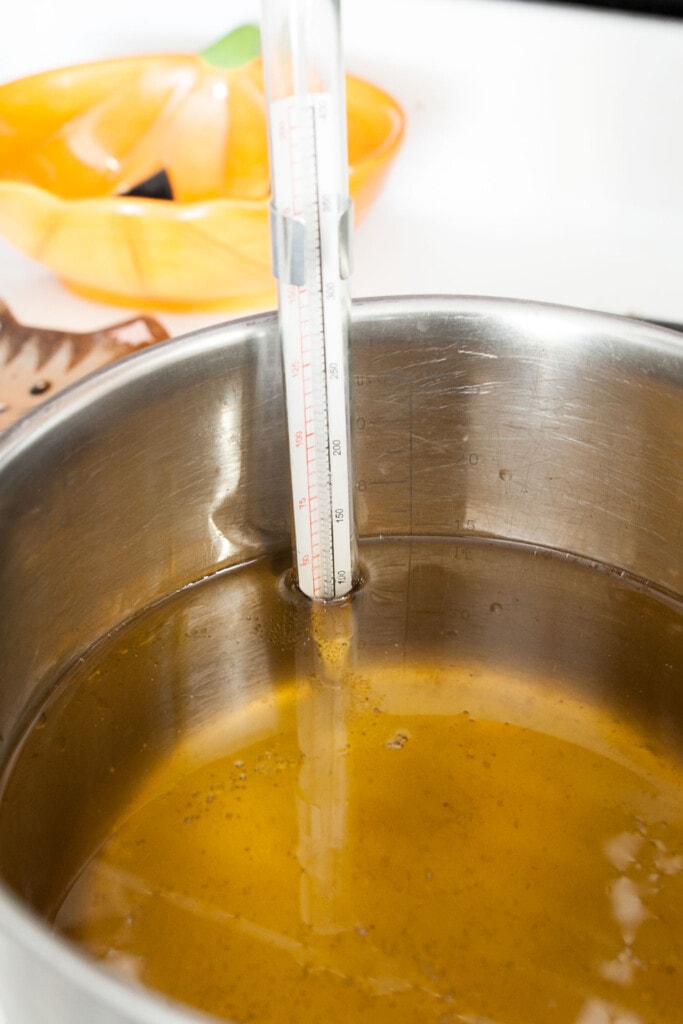
If you have a deep fryer heat it to 350 degrees. If you don’t have a deep fryer like me, you can totally do this on the stove. If I had a deep fryer I would make french fries and bbq wings every single day so it’s best I don’t have one.
PLEASE BE CAREFUL AS THE OIL IS VERY HOT. NO KIDS OR PETS SHOULD BE NEAR THE STOVE. PLEASE BE CAREFUL AS OIL CAN SPLATTER.
Grab a thermometer and put it in the pot, I use a candy thermometer as it goes high. You need to know when the oil is 350 degrees. If you don’t have a thermometer, throw a piece of corn kernel in the oil and when it pops into popcorn, then you know it’s 350 and ready to go.
Now this takes some time to get this hot. Mine takes about 15-20 minutes of crazily watching the thermometer.
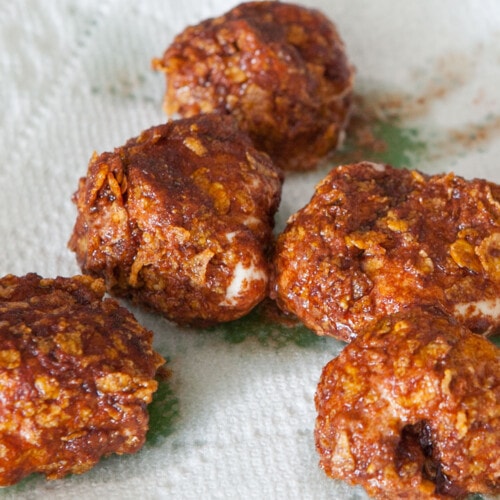
Once it’s 350 degrees, drop an ice cream ball into the oil for 1-2 seconds. Yes, that quick! Do not do any longer or it will melt. You literally drop it in, pull it right back out with a spoon.
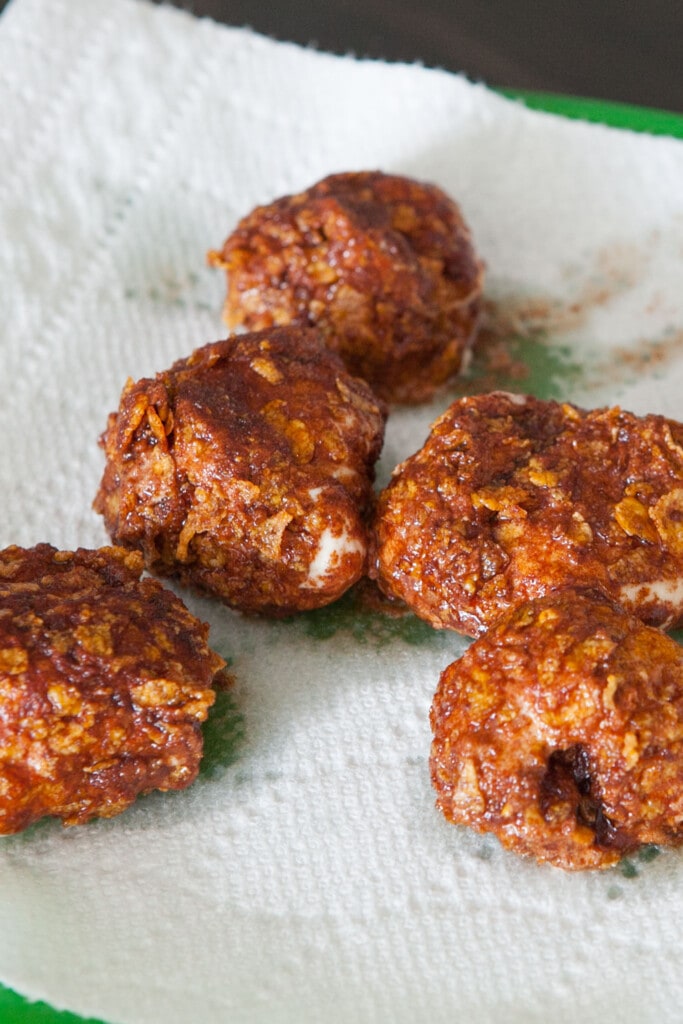
I like to put them directly on a paper towel to get the excess oil off.
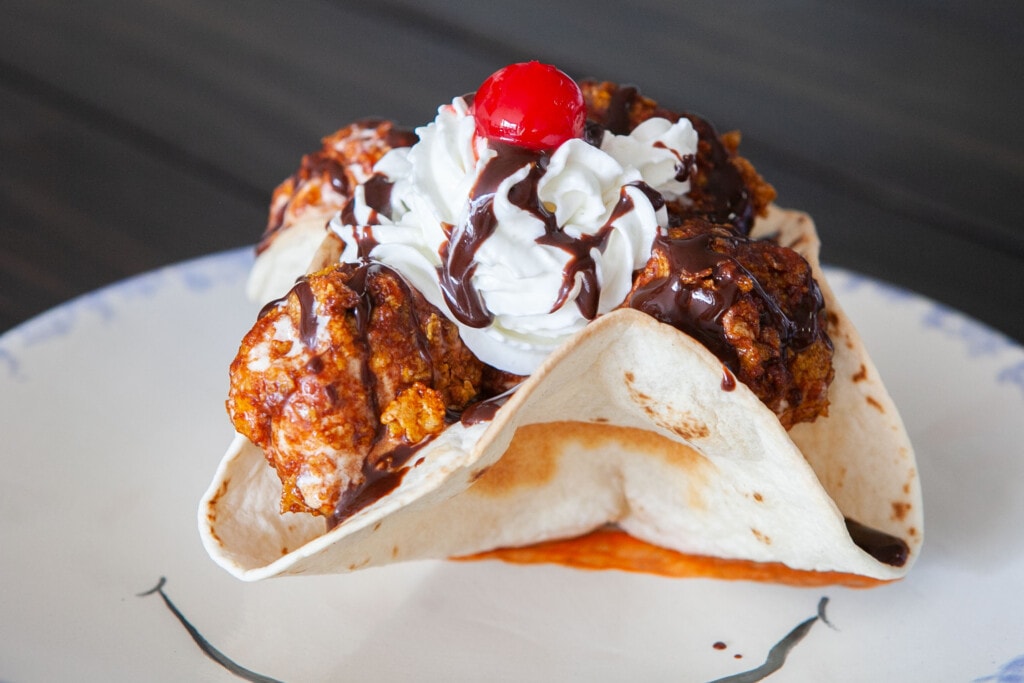
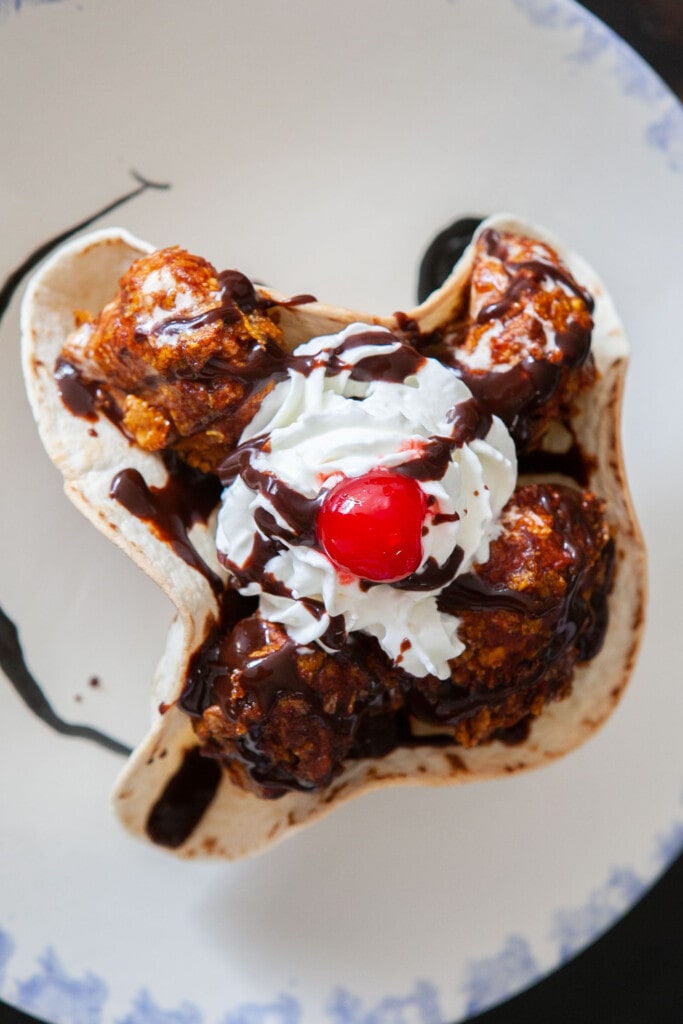
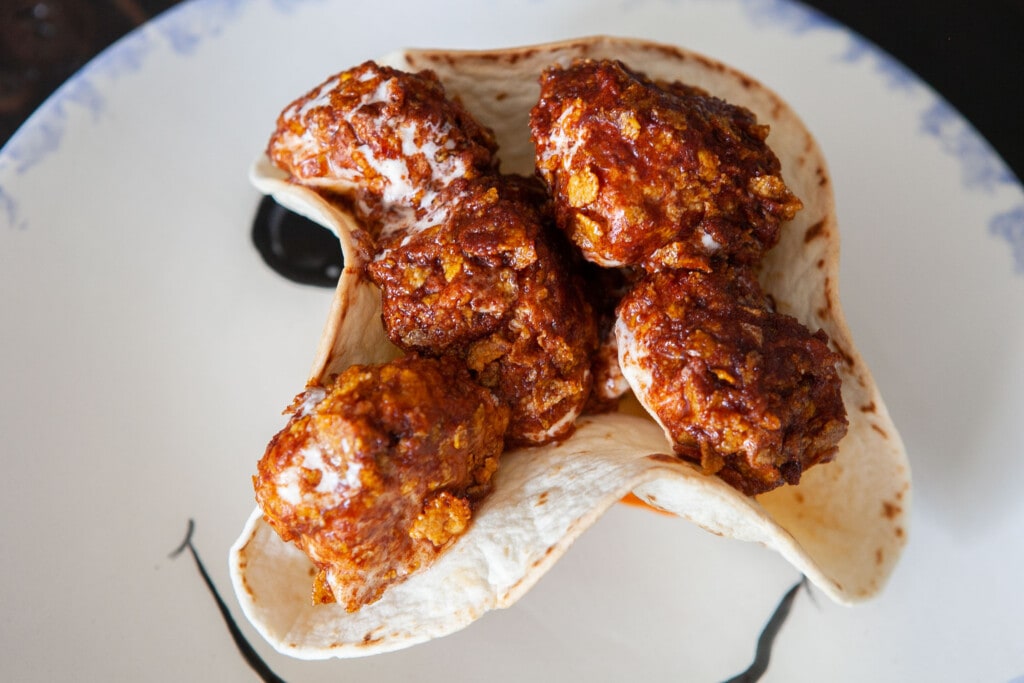
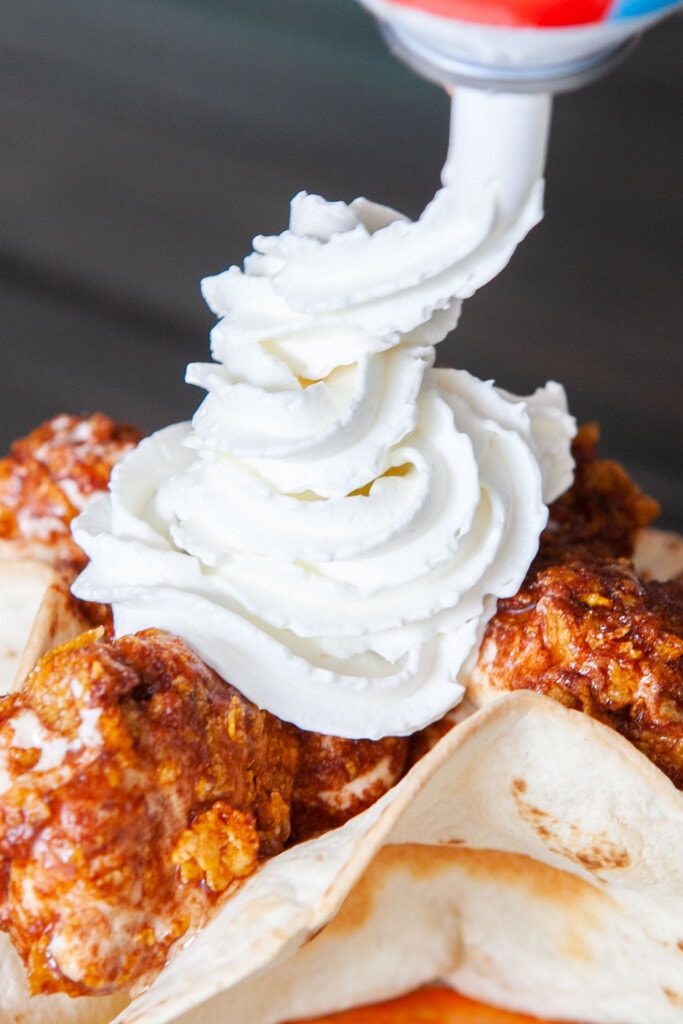
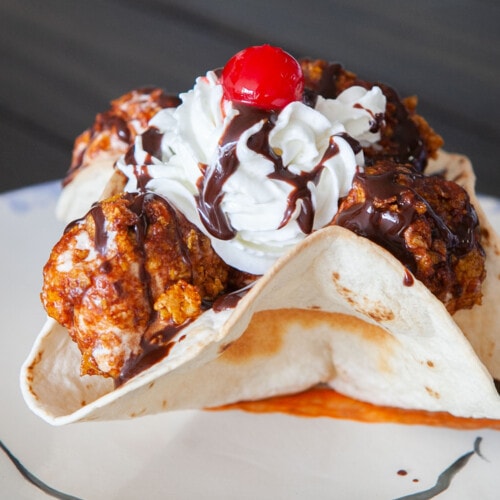
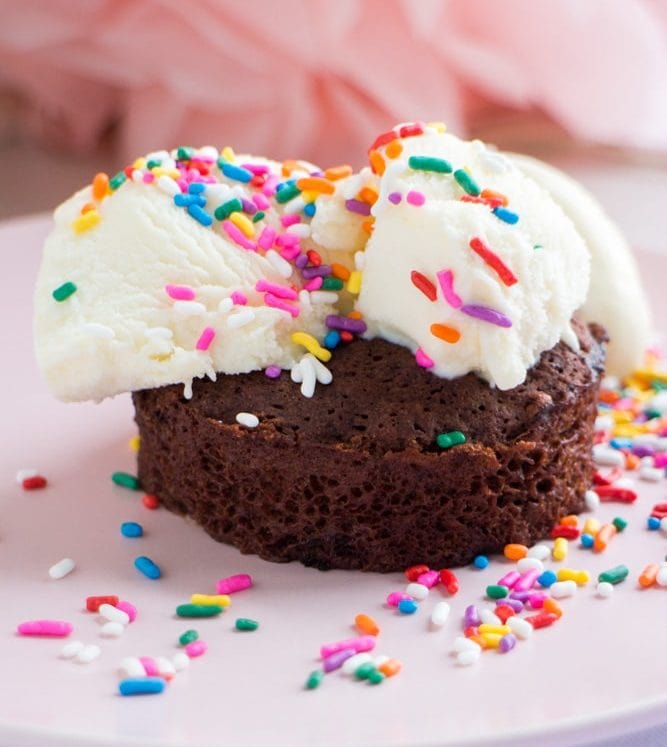
Now start making your sundae by adding the ice cream balls into the tortilla shells! Add toppings (below ideas) if you’d like (you should). Enjoy!
Topping Ideas:
You can serve this as is, but I recommend we take this to the next step with these topping ideas:
Whipped Cream Hershey’s Chocolate Syrup (We got the “Lite” version because obviously we are worried about our figures when are eating fried ice cream with whipped cream on top) Cherries Sprinkles (great if you’re making birthday ice cream!)
I hope you like this Fried Ice Cream recipe! Pin for later: